How to install Microsoft Dynamics 365 Business Central on-premise version for Development
Step 1: Run Setup with Administrator privileges
Step 2: Select Next from below screen
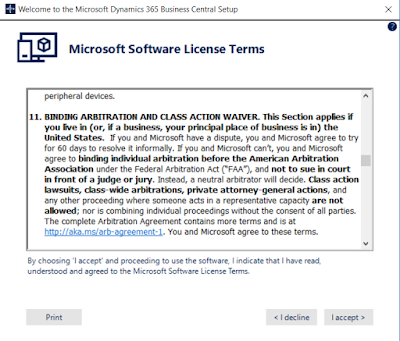
Step 3: Accept Microsoft License Terms
Step 4: Click on "Advance Installation Options" for on-premise
Step 5: Click on "Choose an Installation Options" for Developer
Step 6: Click on "Developer": If you haven't click Customize then you will require to complete Setp 9 to Step 11. Below illustration is with "Developer" option click (without Customize):
Step 7: Define Installation Location, Server Details, Ports (Change if another instance of NAV is already using those.), SQL Server Details, Web Server Component & Help Server Details.
(Recommended to change all ports if other NAV versions install and defaults port are already in use. Make sure you have MS SQL 2016.)
Step 8: Wait till Setup will finish the Installation. If Setup end with error message then check the message and fix accordingly. Error generally come with insufficient privilege, missing prerequisites, etc.
Note: Better to install MS SQL 2016 in advance before installing Business Central.
After successful installation, you will require to install Dynamics NAV Client for C/AL Development Environment & RTC Client.
Step 9: Below setup will require to run if we haven't chosen "Developer" --> "Customize...". If not then, run setup with Administrator privilege again and click on "Add or remove components"
Step 10: Enable / Add all required / missing component from screen
Step 11: Click "Next" to finish the installation
Bingo! You have now completed almost installation for Development with AL (through Visual Studio Code) & C/AL (with C/SIDE Development Environment).
Enjoy Legacy & Advance environment of Microsoft Dynamics 365 Business Central.
Thank You! The Dynamics NAV journey not stopped here and a new era begins here with Dynamics 365 Business Central. In both case, Dynamics keeps moving towards future...


No comments:
Post a Comment